Double opt-in keeps a new contact in Pending status until they confirm their subscription from an email. Pending contacts do not receive campaigns.
Configuration has two parts: prepare the confirmation email, then enable double opt-in for each contact source that should use it.
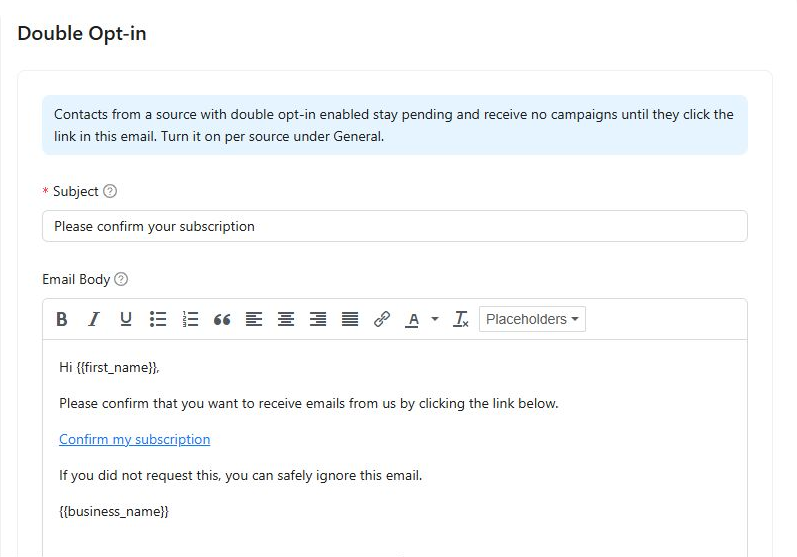
Configure the confirmation email
- Open Kelune CRM → Settings → Double Opt-in.
- Enter the email Subject.
- Write the Email Body.
- Insert
{{confirmation_url}}where the confirmation link should appear. - Optionally enter a Redirect After Confirmation URL.
- Select Save Settings.
The email body must contain {{confirmation_url}}. Without that placeholder, the contact has no link to complete confirmation and Kelune CRM will not save the message.
Available placeholders include:
{{first_name}}{{last_name}}{{email}}{{business_name}}{{confirmation_url}}
Enable double opt-in for a source
- Open Kelune CRM → Settings → General.
- Find the contact-capture source you want to configure, such as WordPress registration or comment-form opt-in.
- Enable that source and choose any default lists or tags.
- Turn on Require email confirmation (double opt-in).
- Save the General settings.
Repeat these steps for each supported source that should require confirmation. Enabling double opt-in for one source does not automatically enable it for the others.
What the contact experiences
- The source creates the contact with Pending status.
- Kelune CRM sends the configured confirmation email.
- The contact selects the confirmation link.
- Kelune CRM confirms the subscription and sends the contact to the configured redirect or built-in confirmation page.